Showing posts with label 2nd Grade. Show all posts

Wednesday, September 02, 2015

Brownie Quest - Connect Key

It's Your World - Change It!: A Leadership Journey
Girl Scout Brownies

I've had several inquiries over the past months regarding how we completed the rest of our Brownie Quest Journey last year. I know it seems like we just kind of fell off the face of the earth. In reality, I overextended myself. Regretfully, the only thing I could responsibly drop to give myself a little breathing room was updating our blog. I'm going to do my best to rewind and provide an abbreviated version of what we did in a series of posts these next couple of weeks.

To recap...Brownie Quest - Discover Key.

Meeting 2

Meeting 3

Quick Note: Although I don't plan to detail it, we did fill in the Brownie Quest Map as we progressed through our Journey. The girls delighted in guessing the names of the keys.


Brownie Quest - Connect Key

To find the Connect Key, Brownies connect as a Brownie Team, with their families on a healthy-living activity, and with their communities to increase healthy-living opportunities.

Brownie Quest Connect Key

Meeting 4
I printed the rules and story I read to the girls from Toobeez.com. I couldn't find my tablecloth, so we used an old beach towel for the sinking ship. The girls had an absolute blast with this and requested to play it a second time. I used information from the Brownie Quest How To Guide (page 60) to both preface and then discuss connecting as a team after the game.

  • Created the Brownie Team Agreement.
I felt the Brownie Team Agreement as presented in the How To Guide was rather dull. I knew it was not going to impress our very active troop of eight-and-nine-year-olds. Thank goodness I ran across a pic of Mrs. Ricca's Kindergarten class promise bulletin board on Pinterest. Feel free to give it a "like," as this display totally transformed our Brownie Team Agreement into something creative and fun. The girls expressively enjoyed signing their agreement with custom paper-crafted self portraits.

After coloring and attaching lines of their Brownie Team Agreement to a piece of tag board, our girls paper-crafted self portraits to "sign" the agreement.

I used information from the Brownie Quest How To Guide (page 61) to type out, print and cut apart the lines to the team agreement ahead of time. (I recommend printing them on white cardstock.) During our troop meeting, I guided the girls in coming up with similar lines by using the answers they gave to the questions from our previous "Connecting as a Team" (page 60) discussion. I jotted down most all of their ideas on a dry erase board and then asked which ones would be the best to include in their team agreement. As the girls answered one at a time, I handed the corresponding pre-cut lines to them to color (we used colored pencils) any way they wanted. In other words, the girl who said, "helping each other" got the "to help each other," line to color.

After coloring and attaching the text with double-sided re-positional tape (to later be glued on permanently by the troop leader at home) for the Brownie Team Agreement to a piece of over-sized colored tag board, I handed out paper-crafting kits that I prepared ahead of time for the girls to make self portraits. I also displayed a sample of myself as a Brownie, so they could understand the idea. Each kit contained an appropriately colored skin tone circle for the head, a dark brown semicircle for the beanie, a slender dark brown rectangle for the beanie tab, a white Brownie elf emblem to be colored by the girl, one heart shape, and one star shape. Cardstock works best for all components. They shared scissors, glue sticks and colored pencils from community school boxes. The heart and the star were to represent the ever popular Girl Scout SWAP. Each girl was supposed to pick just one to write her name on and then attach it to her portrait's beanie at the end with a staple (to represent a safety pin), but some girls used the leftover shapes as barrettes. (An adult may wish to help with the stapling. My girls were exuberant staplers, which jammed the device. After the third time, I took over to prevent tears from damaged projects.) I had a short stack of quarter sheets of paper in various natural colors for them to choose from for their hair. Again, I had the girls use re-positional double-sided tape to affix their portraits to the team agreement. I detached and returned their portraits when I handed out end-of-the-year badges.

  • Learned to prepare two healthy snack recipes to connect with their families on a healthy-living activity at home.
It was nearing Christmas when our troop met to complete this step of the Journey, so I thought making Grinch-themed fruit kebabs with Strawberry Yogurt Fruit Dip (just two ingredients) would make this activity all the more festive. I demonstrated how to make the dip and then the girls made several kebabs to pass out to their parents and the other girls in our multi-level troop as a snack. I also sent home copies of the recipes for the Brownies to add to the family recipe books they made as part of the My Family Story badge. Learning how to make these healthy recipes and preparing them for their family members fulfilled the second part of the Connect Key. Making the kebabs for the other girls in the troop fulfilled Step 4 of the Snacks badge.

Meeting 5
  • Created "Circle Map: Creating Circles of Caring" from the Brownie Quest How To Guide (pages 66-67) more or less as suggested. I drew the concentric circles on a sheet of over-sized newsprint ahead of time. The girls took turns labeling the circles as we progressed through our discussion.
  • Passed out and then read aloud "The Case of the Broken Sidewalk" from the Brownie Quest girls' book. Discussed the corresponding questions from the Brownie Quest How To Guide (page 68). We also discussed what improvements could be made to better the city of Green Falls (How To Guide, page 64 and/or girls' book, page 61).
  • Crafted concentric circle bookmarks from circles that I pre-punched from heavy decorative cardstock (leftovers from a personal scrapbook project), colored craft sticks and glue (in the form of glue sticks).
  • Passed out Caring About Your Community slips to be completed at home and returned the next meeting. - The final part of earning the Brownie Quest Connect Key!

Tessa reluctantly posed with the concentric circle bookmarks she crafted during our "circle map" troop meeting.
Tessa reluctantly posed with the concentric circle bookmarks she crafted during our "circle map" troop meeting. 

Wednesday, June 24, 2015

Chemistry: Atoms & Molecules (Block 1)

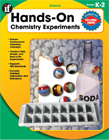
Och! Chemistry for a seven-year-old? Not an easy find. After spending a ridiculous amount of time searching and thinking, I finally settled on coordinating Louise and Richard Spilsbury's Building Blocks of Matter series with Carson-Dellosa's Hands-On Chemistry Experiments resource books, Bill Nye the Science Guy videos and an assortment of related titles available from our local library for our first two six-week blocks of chemistry. For our third and final block, we studied the period table of elements, which I'll detail in a later post.

Building Blocks of Matter: Atoms and Molecules by Louise and Richard Spilsbury Hands-On Chemistry Experiments, Grades K-2 by Carson-Dellosa Publishing Hands-On Chemistry Experiments, Grades 3-5 by Carson-Dellosa Publishing Bill Nye the Science Guy: Atoms DVD by Disney

Carson-Dellosa's Hands-On Chemistry Experiments includes student lab sheets, which Tessa completed in addition to the experiments themselves. Both the experiments and labs sheet may be previewed in full on Carson-Dellosa's Web site.

Completed August - October 2014.


Day 1

Day 2

Using Janice VanCleave's "83. Building Blocks" experiment as a guide, Tessa created a model of a lithium atom with a plastic milk jug cap, pipe cleaners and colored pony beads.

Day 3

Day 4

Using Janice VanCleave's "84. Bonded" experiment as a guide, Tessa constructed a model of the physical structure of a methane molecule with toothpicks and gumdrops.

Day 5

Day 6

Day 7

Day 8

Day 9

Tessa observed that oil, water and corn syrup have different densities. Before dropping small objects of various weights into the cup, she guessed where each would stay and then recorded the actual results. This was quite entertaining.

Day 10

Is it magic? No, it's density!

Day 11
Day 12

Day 13

Day 14

Day 15

Day 16

Tessa created a model with marbles and rice to demonstrate how salt can be poured into a seemingly full glass of water without flowing over. The grains of rice fill in the spaces between the marbles just as the grains of salt move around in water and take up the empty pockets of space that are between the water molecules, which is what initially keeps the glass from overflowing.

Day 17
Hands-On Chemistry Experiments, Grades K-2 "Let It Flow" (page 18) by Carson-Dellosa Publishing fits well here, but we did not conduct it due to its simplicity. Tessa had completed similar activities in the past.


Day 18

Day 19

Day 20

Day 21

Day 22
Hands-On Chemistry Experiments, Grades K-2 "Popsicle Puddles" (page 52) by Carson-Dellosa Publishing fits well here, but we did not conduct it due to its simplicity. Tessa had completed similar activities in the past.


Day 23

Day 24

Day 25

Thursday, November 06, 2014

My Family Story

Tessa's troop enjoyed Brownie Quest so much during their first Journey meeting that I was a little afraid to switch over to My Family Story badgework so soon. It seemed a natural break, though...like there should have been a big red arrow in the leader guide pointing to "insert My Family Story badgework here" (that would have been helpful, actually). Maybe our girls aren't picky, but they seemed to enjoy it just as well. Their favorite part was making family trees. It was all I could do to contain their excitement upon seeing my sample.

The full requirements for earning the My Family Story Badge can be found in the Brownie It’s Your World - Change It, Skill Building Badge Activity Set. The resources listed below are the ones we used to fulfill these requirements. We spread the work over two meetings.

Brownie My Family Story Badge


My Family Story

Every Family has stories. It's good to share them so you know who helped make you who you are. Do this badge to find out more about the people you love and who love you. That's your family!

1. Explore family stories. There are all kinds of family stories and all kinds of families. As you explore these stories, think about the questions in the box below. Talk about your answers with your family and Brownie friends!
  • Troop completed choice #3 - Share family stories with friends.
  • The girls used their completed Blue House School Discovering Family bags (scroll to bottom of linked page) as visual aids for telling about their families. (The Discovering Family bags I designed for the girls were intended to be twofold. Identifying the special qualities and values of their families at home fulfilled the final step of their Brownie Quest Discover Key. Using the bags as visual aids for sharing what they learned about their families with the rest of the troop fulfilled this step.)

Tessa included smiley face stickers, a wooden sunflower cutout (to represent Sunny the Sunflower) and a Playmobil doctor as clues in her Discovering Family bag. She chose "friendly and helpful" from the Girl Scout Law as the value that is important to our family because "being friendly and helpful shows that our family cares about people."

2. Know where your family is from. Find out which different countries, states, or towns your family comes from. Family stories are passed down differently in different cultures. How does your family share its family traditions and history?
  • Troop completed choice #3 - Ask about a family recipe.
  • The girls made troop family recipe books with recipe cards that I sent home for their parents to fill out. I made photocopies of all of the completed cards for the girls to put in their books. (This project ties in with our Step 5 project below.)
Quick note: I realized when cutting out the aforementioned completed recipe cards that I messed up when designing them. Some are not correctly sized. And, they are just a funky size, in general. You might be better off searching for free recipe card printables on Pinterest. I'll try to fix this as soon as I can.

3. Make a story tree. Knowing who your family members are is only half the fun! Find a special detail about each person to write on your family tree. Then make your tree in one of these ways.
  • Troop completed choice #2. - Draw or paint your tree.
The previously mentioned Discovering Family bags were actually supposed to be threefold, but some girls missed a meeting due to parent-teacher conferences, so I ended up modifying my original idea a bit. Since I already had the girls draw their family members and write their special qualities on their Discovering Family bags, I had planned to collect the bags to scan their pictures into my computer, play around with them a bit in Photoshop and then print them in color on cardstock at appropriate sizes. Afterward, I had planned to use a circle punch to create ornaments the trees.

Here's what I ended up with instead. To save time, I made up kits for the girls that we completed one step at a time. It took about half an hour for the them to complete their family trees. I have included a quick rundown of the project below. For the most part, the only steps some girls needed physical assistance with were tying knots and gluing wiggle eyes and feathers on the bird. I was a little surprised how well they did and how well they turned out.

Sample family tree I created for Brownie Elf.

My Family Story Tree Kit
  • Small tree limb with many branches, which each girl selected from a table
  • Small tin pail with floral block cut to fit snuggly in the bottom half of the pail
  • School glue
  • Pre-measured pebbles in small plastic zipper bag, enough to fill to the top embossed line of the pail when poured on top of the floral block (pebbles were originally purchased from Lowe's for another project)
  • Excelsior grass (handed out in small clumps when we got to the appropriate step)
  • "Family" sign created with Going Places Cricut cartridge, 2 inches at actual size
  • 6-in. piece of orange ribbon (color matches the bird's beak)
  • Fifteen cardstock leaves (three each of red, orange, brown, green and yellow), which I cut from 2-in. circles with the pre-mentioned Cricut cartridge, folded, trimmed to shape and then punched with a teeny hole for hanging
  • Fifteen small metal Christmas ornament hangers
  • Large pre-threaded (and knotted) needle with a small eraser over the point for safety
  • Orange felt beak cut to size
  • Two small wiggle eyes
  • Two pompoms, which the girls selected from a bag
  • Feather, which the girls selected from a bag
  • Black, non-smear pen
  • Scissors

Believe it or not, I had most of this on hand. The only things I had to buy were the tin pails from Dollar Tree and a cheap pack of small Christmas ornament hangers from Wal-Mart.


My Family Story Tree Instructions
  • Complete Pom-pom Songbirds as directed, except substitute wiggle eyes and use smaller pompoms (set aside to dry)
  • Carefully center and push selected tree limb into floral block in pail (make sure the handle of the pail faces the front)
  • Cover floral block in pail completely with school glue, pour in half the small bag of pebbles, cover again with school glue, pour in the rest of the pebbles, cover one more time with school glue
  • Run a line of glue along the bottom of the "Family" sign and nestle into the pebbles in front of the tree
  • Press a clump of excelsior grass in the front of the pail, repeat for the back (add a bit more glue before or after, if needed)
  • Write names of family members (limited to those that live in the girl's house; I also allowed pets) on leaves, hang on tree; hang any number of extra leaves, if desired
  • Glue pompom bird into a study forked branch (test fork before gluing)
  • Knot ribbon around handle as shown, trim ends

Another potentially cheaper, simpler option I considered was to have the girls make paper bag trees and glue on the leaves. Birds could be made and added as well. Alternatively, birds could be purchased from a craft store or made by a troop leader ahead of time.

Tessa and her troop crafted family trees from real tree limbs for part of their My Family Story badges.

Tessa's completed My Family Story tree.

A couple of other family trees created by girls in Tessa's troop.

4. Find an object that means something to your family. Objects like photos, jewelry, and books can mean a lot. They can be favorite things from old times, or things that make people feel special. This means that objects can have their own stories.
  • Troop completed choice #1 - Ask about an old photo, or #2 - Talk about an object that has been handed down. (Each girl chose which of the two to bring to share in show and tell fashion.)

5. Share your family story. You've heard so many amazing family stories. Now it's time to share them with others! Pick one of these activities to help you tell your story.
  • Troop completed choice #2 - Make a family crest.
  • The girls completed contemporary "family crests" for the covers of their troop family recipe books. (This project ties in with Step 2.)

Tessa's troop created contemporary family crests for the covers of their family recipe books from patterned and plain cardstock, paper flowers, jeweled brads, shaped brads and pipe cleaners. Each girl chose from an assortment of papers, colors, shapes and brads to symbolize various aspects of their family.
Tessa's troop created contemporary family crests for the covers of their family recipe books from patterned and plain cardstock, paper flowers, jeweled brads, shaped brads and pipe cleaners. Each girl chose from an assortment of papers, colors, shapes and brads to symbolize various aspects of their family.

Purpose

When I've earned his badge, I'll know how to tell my family story.


Growing Girls Scouting Helpers Logo
Looking for more My Family Story badge ideas?

Check out my My Family Story Memory Book - Girl Scout Brownies - All 5 Steps! printable scouting helper.

Tuesday, October 07, 2014

Computer Expert Badge

Brownie Computer Expert is one of those Girl Scout badges that I am both thankful for and rue just a bit. I will admit that I had been a little neglectful in developing Tessa's computer skills. It was always one of those we-will-get-to-it-one-day kind of things. I also wasn't keen on her using our laptop. And until recently, we were on a limited mobile broadband connection. After I lucked out in snagging a $59 Chromebook from Amazon and our neighbors installed an internet tower on their property, I really didn't have anymore excuses.

As I feared, though, Tessa asks to use the computer nearly every day now. Plus, there's recently been a rash of stuffed pet adoptions in our house. Ugh.

The full requirements for earning the Computer Expert Skill-Building Badge can be found in the Brownie It’s Your World - Change It, Skill Building Badge Activity Set. The resources listed below are the ones we used to fulfill these requirements.

Note: Even though Computer Expert is an associated badge for the Brownie Quest Journey our troop is completing, it's not one I currently have scheduled to complete as a troop. Logistically speaking, it's a little more complex than some of the other badges. I may end up sending it home with the girls who want to earn it on their own.


Computer Expert

Computers help you do so much. You can make amazing art, find incredible facts on the Internet, and send fun cards to friends and family. Earn this badge and you'll be a safe, secure computer expert!

Thanks to Girl Scouts, Tessa is a "computer expert" now!

1. Paint or draw with an art program. Just like a paintbrush, a computer can be a tool to make art. Movie animators, game makers, and people who design ads and take professional photos all use programs to make their art even better. Now it's your turn!

  • Completed choice #1 - Paint a picture.
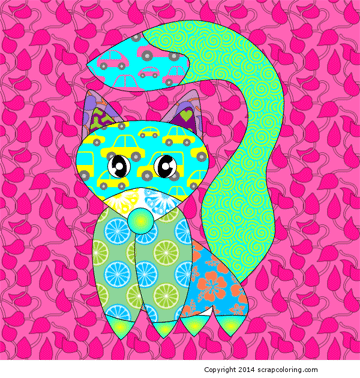
  • Digitally painted pictures with Scrap Coloring. Scrap Coloring offers hundreds of free pictures that are very easy to digitally color, save and print. Three of Tessa's creations are featured below. She enjoyed experimenting with bright colors and wacky patterns for her designs.

Tessa's Scrap Coloring dog. Tessa's Scrap Coloring fox. Tessa's Scrap Coloring sub.

2. Find some cool facts. The Internet is like an encyclopedia that constantly changes and gets bigger. Use search engines to learn about a fun subject. (Search engines like Google and Bing use special math to quickly search the Web. They bring back links to articles, images, and videos related to what you typed.)
  • Completed choice #1 - All about animals.
  • Used KidRex to search for information about black bears. (I had planned to share the five facts Tessa came up with, but I have misplaced her list.)

3. Take a trip online. Just like a good book, the Internet can take you across your town or across the world--without getting in the car or on a plane! Learn something new from a trip on the Web.
  • Completed choice #1 - Road trip.
  • Used Google Maps to find our house, our local public school, Grandma's house and Sanibel, Florida, one of our family's favorite vacation spots. Tessa's especially liked the satellite and street views.

4. Make a connection. E-mail. E-cards. Instant messages. Wall posts. Video chats. These are just some of the ways to keep in touch with friends and family on the Web. Try one for yourself!
  • Completed choice #1 - Here is my card.
  • I thought sending e-cards would be a fun, easy choice for Tessa. As it turned out, pretty much all of the free e-card sites I used to use years ago are no longer free or you have to sign up for trials, etc. to access free content. Our experience ended in frustration time and again after one site and the next strung us along. Tessa ended up somewhat begrudgingly choosing "Carve a Happy Halloween" from Blue Mountain's sparse Halloween freebie section to send to three relatives.

    Note: Be sure to either preview all of the cards in a particular section or stick to the "for everyone" or "kids" sections before letting your girls roam around. I was surprised a couple of times when a few of the cards on various sites turned out to be decidedly adult.

5. Have more computer fun. From downloading music and making art to playing silly games that take you on adventures or make learning math or typing a blast, there are many more ways to have computer fun.
  • Completed choice #1 - Game on!
  • Played games at Webkinz, PBS Kids and Nick Jr. Webkinz was by far Tessa's favorite. Luckily, I saved (and found) the Webkinz code tags from various stuffed animals Tessa received as presents over the years. Along with a couple more critters than we picked up for cheap (as low as $1.99) at Tuesday Morning, she now has a small menagerie she plays with.

Purpose

When I've earned this badge, I'll know how to do many useful things on a computer.

Thursday, October 02, 2014

Brownie Quest - Discover Key

It's Your World - Change It!: A Leadership Journey
Girl Scout Brownies

As mentioned in a previous post, I am serving as co-leader for Brownies for the first time this year. We are a multi-level troop, so other leaders and parent helpers are working with the older girls.

Our Brownies will focus on the Brownie Quest Journey and associated badge work this time around. The troop meets every other week for about an hour and a half, which includes some introductory time with the entire troop and snack time. We will lose a handful of meetings to parties, prep work for World Thinking Day, inclement weather, etc. So, that's not a whole lot of time to get things done. My goal is to creatively cram as much fun and badge work into those days as humanly possible. Every now and again, I will squeeze in bits and pieces from Legacy badge work as well. If all goes as planned, the troop should be able to earn their Brownie Quest Journey, My Family Story, My Best Self, Home Scientist and Bugs badges this year. Hopefully, we'll find time for Money Manager and Meet My Customers too. Eek, that's a lot! We'll see how it goes.

Quick note related to the Discover Key, which is what this post is really all about. I made an executive decision to switch the order of Steps 1 and 2 in case we ran over into snack time a bit. Our chosen activities just fit better in my mind that way. Also, I typed out and adapted various parts of the script in the Brownie Quest How To Guide, which I read as we progressed through our meeting. Although Tessa and I will likely read the story from the Brownie Quest girls' book at home, we will not read it as a troop due to time constraints. I may use a piece from it here and there, but I have opted not to purchase copies of the book for the girls.

My apologies for not posting any photos from our actual meeting. There just wasn't any way for me to snap any while conducting the meeting. I took our camera and meant to have my husband take some, but I totally forgot to have him do so. Maybe next time...


Brownie Quest - Discover Key

To find the Discover Key, Brownies discover their special qualities and talents, the values of the Girl Scout Law, and the special qualities and values of their families.

Meeting 1
  • Sang the Brownie Smile Song.
We will begin the Brownie portion of each meeting with the Brownie Smile Song during the first half of the year. After that, we will switch to the Brownie Hiking Song. Doing so will nearly fulfill Girl Scout Way, Step 1.

I downloaded the Brownie Smile Song audio file from Girl Scouts University Song Leading Mini-Workshop and then played it during the meeting as the girls and I sang along. I also created my own lyrics sheet to match the audio file, which uses a slightly different version of the Brownie Smile Song than the lyrics sheet provided by the workshop. I posted the lyrics sheet on a portable magnetic dry erase board at the meeting as a visual aid to help the girls follow along and learn the song.

  • Searched to discover the values of the Girl Scout Law with a scavenger hunt. - Discover Key, Step 2 completed!
Our scavenger hunt was very similar to what is suggested in the Brownie Quest How To Guide. I took the activity one step further by having the girls assemble a set of paper keys with the lines of the Girl Scout Law printed on them. The completed key ring doubles as a set of flash cards to help the girls learn the Girl Scout Law at home. I promised a I Know the Scout Law Fun Patch to any girl who can memorize and recite the Law to me without mistakes.

For the discover the values of the Girl Scout Law scavenger hunt, I created bright orange packets of paper keys with lines of the Girl Scout Law printed on them that I hid in plain sight around our meeting space. After going ELF, each pair of girls brought back two packets...one for each girl. At my command, they dumped them onto the floor and guessed what the clues added up to. After correctly guessing the Girl Scout Law, we stacked the keys in the correct order. Finally, the girls added paper "Girl Scout Law" key fobs and fashioned key rings out of pipe cleaners (that I previously had cut in half).

Completed Girl Scout Law key rings double as flashcards to help the girls learn the Law at home. These must be printed on heavyweight card stock for durability. I used Staples® Brights, 65lb. Colored Paper in assorted colors. Leaders, please note that this activity is not for the faint of heart or cutting challenged. You must cut out eleven keys, plus the heart for each girl!

  • Discovered the girls' special talents and qualities by creating personalized I Spy jars. - Discover Key, Step 1 completed! (This also fulfills Senses, Step 1.)
I actually designed Find Out About... Cootie Catcher, which I based on the "Discovering Me" star from the Brownie Quest girls' book, over the summer to fulfill this step of the Journey. While I still think it's a good activity, one my daughter was excited about, the amount of writing it requires nagged at me. Our troop is primarily composed of new second graders who are still learning to spell and develop their writing stamina. I ended up changing my mind a couple of weeks ago. Instead, we made personalized I Spy jars!

I had long planned I Spy bottles for the first part of the Senses badge, so I was thrilled when the little light bulb in my head finally clicked on to show me that I could combine both the Senses and Discover Key steps. After a couple of brainstorming sessions with my friends at Pinterest, I decided to design a card with a checklist to make this idea work.

The I Spy jars took a lot of preparation on my part, but the girls absolutely loved them. Most of the what-nots I already had in my craft closet, so the jars were cost-efficient for us. If everything had to be purchased new, it could get pretty pricey. Luckily, I've been saving recyclables for over a year and had just enough empty Peter Pan Peanut Butter jars for the troop.

Note: The I Spy checklist must be printed on heavyweight cardstock. It also must be sent through your printer twice for front-to-back printing. (I have a duplex printer, but I couldn't get the cards to print correctly no matter what I did. Hopefully, others will have better luck.) Make sure you do some testing on scrap paper, as printers can be finicky. Be sure your paper is stacked neatly after every page or you may end up cutting the margins a little close on some of cards. I actually printed extra and picked the best ones for the girls to use with their jars.

The girls in our troop had a blast making personalized I Spy jars to discover their special talents and qualities. I prepared a couple of batches of colored rice and pre-measured it into zipper bags ahead of time. I also cut a funnel from an empty half-gallon milk jug that worked perfectly for pouring rice into the jars. A parent helper hot glued the jars shut during the meeting. Rubber bands were used to attach the removable checklist to the jar.

  • Handed out Discovering Family bag to be completed at home and returned at the next troop meeting.
I felt Discover Key, Step 3 a good place to transition to My Family Story associated badgework, so that's what we will mostly be working on during the next two meetings. I also handed out family recipe cards to be brought back the same day. The Discovering Family bag activity will fulfill the final Discover Key step as well as My Family Story, Step 1. The family recipes cards will fulfill My Family Story, Step 2.

Quick note: I realized when cutting out the aforementioned completed recipe cards that I messed up when designing them. Some are not correctly sized. And, they are just a funky size, in general. You might be better off searching for free recipe card printables on Pinterest. I'll try to fix this as soon as I can.

I created a sample Discovering Family bag for Brownie Elf to give the girls and their parents an idea of what a completed bag should look like. The girls will have fun guessing what Girl Scout Law value their fellow troopmate's families chose at the next meeting. Brownie Elf's family picked "be a sister to every Girl Scout," so she put a paper doll chain, a trefoil and a Girl Scout fun patch in her bag as clues. Her family considers friends to be family. Brownie Elf wants the girls in her troop to feel like family.

Meeting 2 (Scheduled for mid-October, 2014.)

Thursday, September 18, 2014

Girl Scouts - First Brownie Meeting!

Hope you're ready for some sprightly adventures. Tessa's a Girl Scout Brownie! Once again, we'll be documenting Tessa's badge-earning efforts here on Blue House School blog. This year, I am assisting our troop as a co-leader for Brownies. Our primary focus will be completing the Brownie Quest Journey. I plan to intertwine a few of the associated badges and whatever else I can manage to squeeze in. Our troop only meets twice a month, so Tessa will be working on additional badges and awards on her own time as well. She wants to earn them all again. Wish us luck...it's a lot of work!

Tessa sporting her new Brownie vest and beanie before heading out for our first meeting of the year. (Technically, it was our troop's second meeting, but Tessa was sick for the first.)

We were in charge of snacks. I had planned on simply taking Rice Krispie treats with decorative sprinkles on top, but then I made the "mistake" of taking a peek at Pinterest. Twenty-five dollars and four hours later, we ended up with Owl Krispies and a nest of Chocolate Peanut Butter Acorns. Ah, well...the girls loved them.

Thursday, September 11, 2014

Girl Scouts Global Action Award 2014

We are always on the lookout for quality life experiences for Tessa (hence our involvement in Girl Scouts). When we decided on a last-minute cruise with a port of call in Costa Maya, Mexico for our fall vacation this year, I knew The Native Choice Mayan Experience Tour would be a great opportunity for Tessa to earn her Global Action Award. As it turned out, it far exceeded our expectations. I highly recommend it to anyone traveling that way.

I'm not sure how much thought most troops give the Global Action Award, but to me, it's one of Girl Scouts' most important. It's nice for our girls to say that they want to make the world a better place, but the Global Action Award teaches why the world needs them to do so. I just wish Girl Scouts would go a step further and provide better support for this award. A good book and video list with copies available for checkout at Girl Scout resource centers across the nation would be a great start.

While the Mayan Experience Tour touched upon several of the United Nations' Millennium Development Goals, the one we primarily focused on was 2. Education opens doors. We completed a service project to benefit a village school in Costa Maya, which compliments activity nine from the Global Action Award for Girl Scout Brownies activities list.

2104 Girl Scouts Global Action Award

We began our Mayan Experience Tour an hour inland at Chacchoben Maya Ruins...a very nice collection of ruins in a jungle setting.
We began our Mayan Experience Tour an hour inland at Chacchoben Maya Ruins...a very nice collection of ruins in a jungle setting.

After leaving the Maya ruins, we stopped at a nearby village where Tessa got a firsthand look at modern Maya homes. It was fascinating to discover that many of them are built on top of ancient Maya homes...often built with some of the very same brick! She learned that people grow their own food and hire hunters to acquire meat. The beautiful vegetation around Maya homes is functional. The plants provide herbs, fruits, coffee, cocoa and other foodstuffs.

Our tour guide explained the process of turning corn into flour as a Mayan woman demonstrated how to make corn tortillas. Modern Mayans speak the Mayan language as well as Spanish. (Many younger generation Mayans speak English as well.)

Tessa tried her hand at making a corn tortilla. We all did, actually. Our host who had many, many, many, many, many more years of practice had to tidy ours up a bit.

Corn tortillas are a staple of the modern Maya diet. Our tortillas were cooked on an open-air stove, which is the typical method of cooking at the village. The flavor and texture is a little different than those we buy here at the store, but Tessa loved them. I think she ate six-to-eight of them.
Corn tortillas are a staple of the modern Maya diet. Our tortillas were cooked on an open-air stove, which is the typical method of cooking at the village. The flavor and texture is a little different than those we buy here at the store, but Tessa loved them. I think she ate six-to-eight of them.

Our tour guide, David, who is also co-owner of The Native Choice, showed us the fruits, vegetables, beans, herbs and spices commonly used in Mayan cooking.

We enjoyed a traditional modern Maya meal as part of our tour. It was delicious! We particularly liked the chicken tamales and passion fruit.

For Tessa's Global Action service project, we donated school supplies and some of Tessa's new and gently used clothes to children in Costa Maya.